Although manufacturers of operating systems (the programs that run your computer - such as Windows and Apple IOS) provide a default filing process with dedicated folders to hold different types of file, saving documents without understanding the folder system will invariably lead to cries of “I’ve lost it”.
In this article I hope first to throw some light on how files are stored and managed on computers and then to offer some golden rules for good file management. With regard to how files are stored the explanations cover the Microsoft Windows Operating System used on desktops and laptops. It does not cover devices such as tablets and smartphones. Neither does it apply to the Apple Operating System on iMacs and Macbooks. Despite this, the golden rules I offer cover any kind of file management and storage.
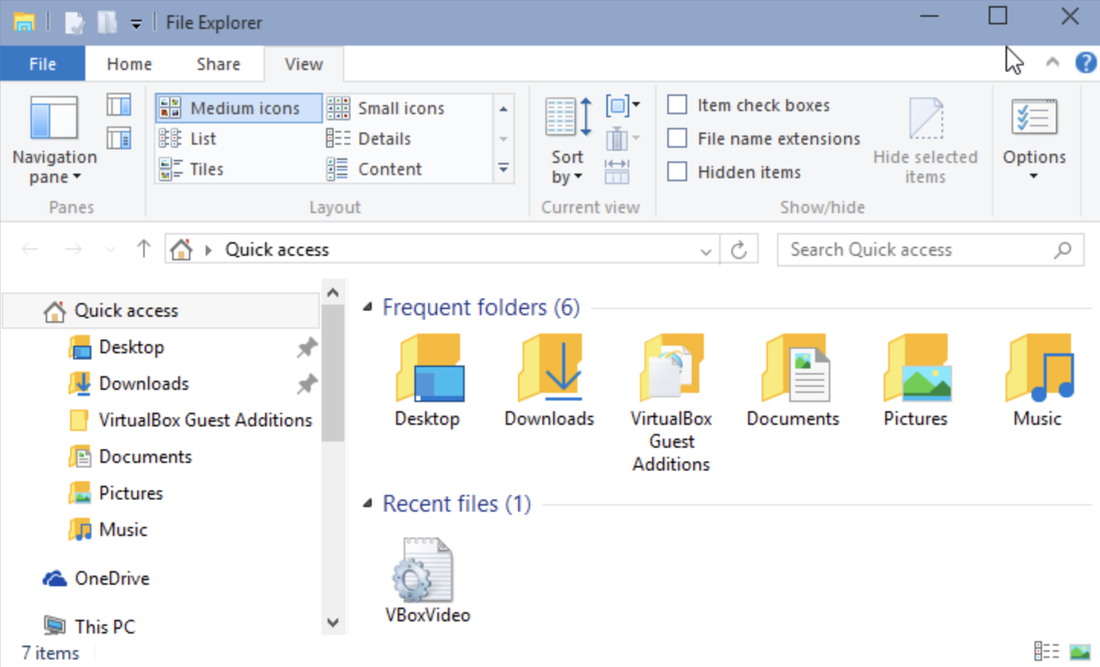
Let’s begin. You will be familiar with the way that Windows manages its files because one of the inbuilt programs is its file manager which it calls File Explorer (previously Windows Explorer). This is ever-present on your computer and accessed by finding the icon that looks like this on the task bar at the bottom of the screen or on your desktop.
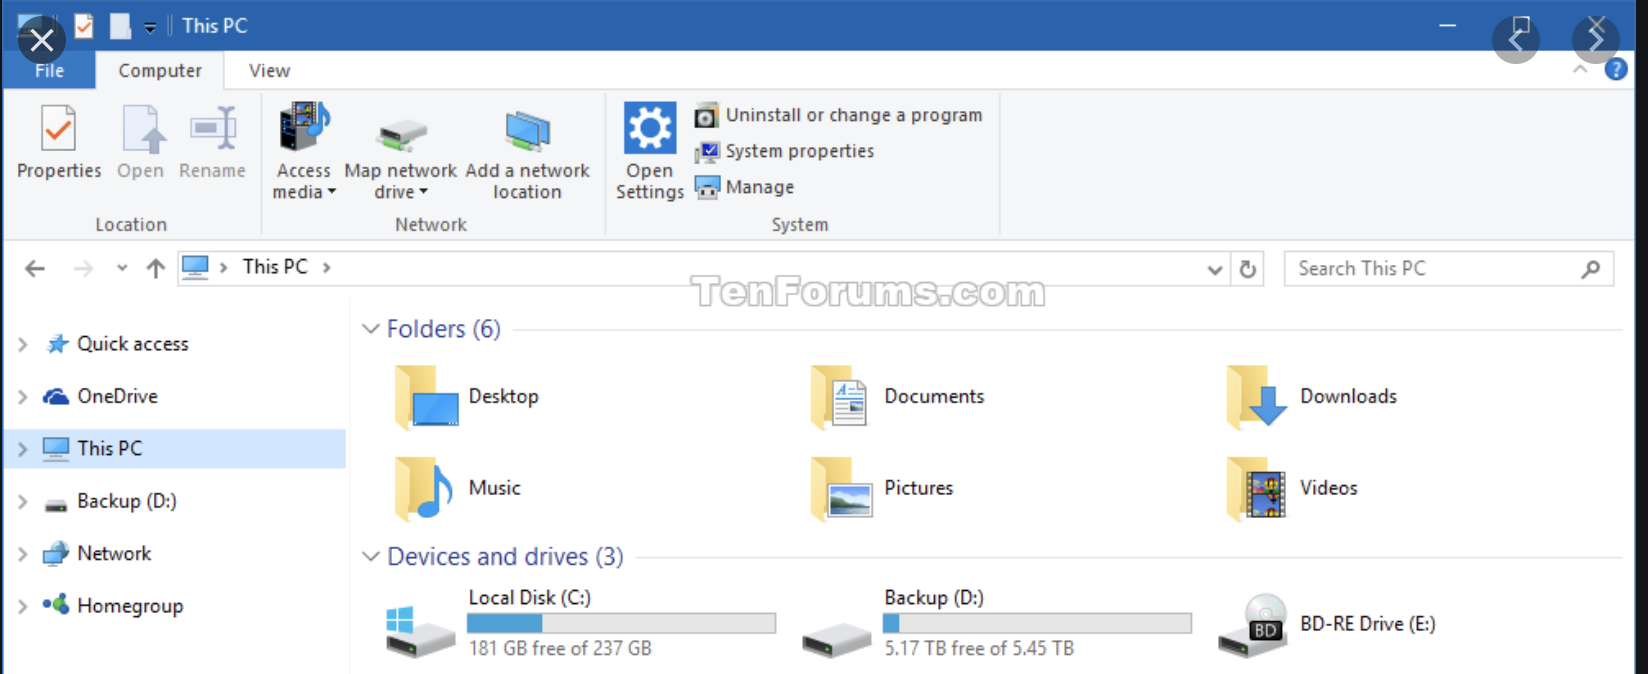
Quick Access
One Drive
This PC
Network
Within Quick Access Microsoft provides the default folders called Desktop, Downloads, Documents and Pictures, and (sometimes) Music and Videos. (Note that you can add any file or folder to the Quick Access list. I will cover this a little later.)
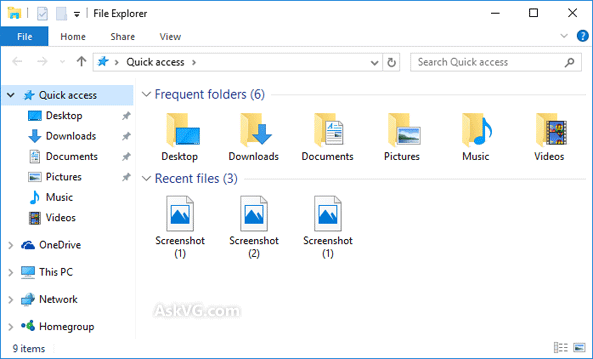
Notice also the little symbols to the left of each. These symbols are either > or v. Clicking on > will expand the entry and create a drop down menu of its contents. If you click on the v symbol it will wrap them up again under the one heading.
In this first picture, look at the line on the left called 'Quick Access'. You can see that the > symbol is against it.
Now in the following picture, clicking on the > symbol opens the drop down menu and the symbol changes to v
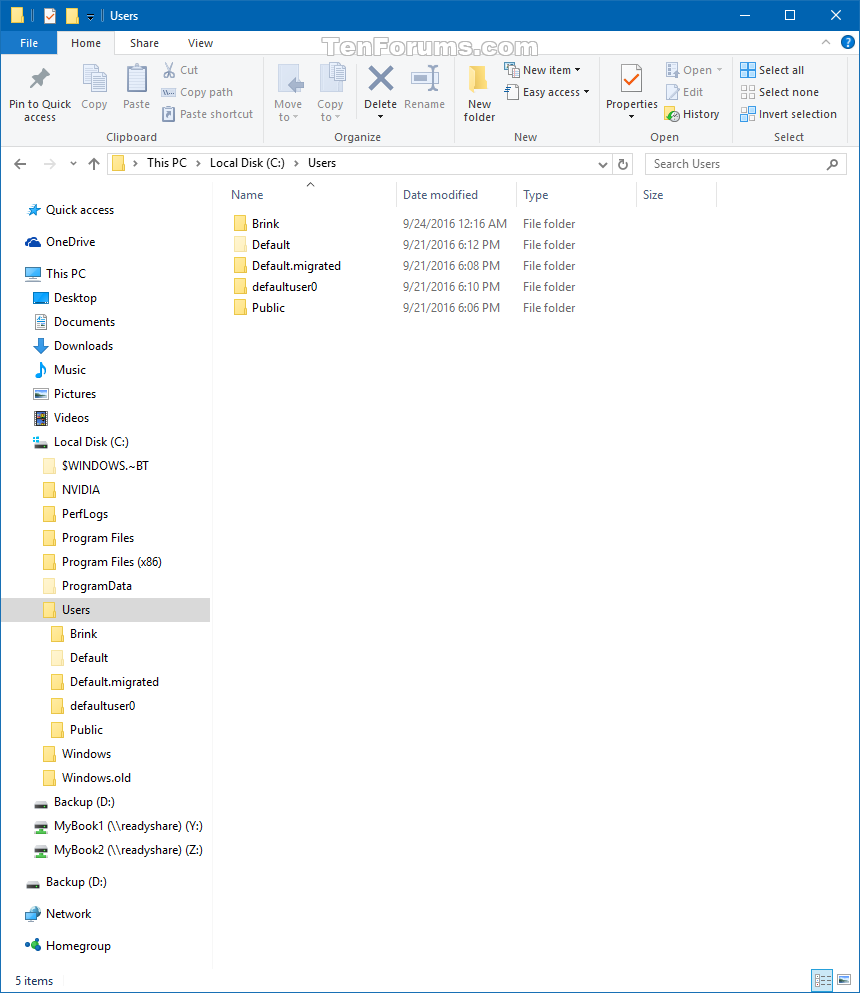
This Local Disk partition is also where Windows keeps all the programs it needs to manage your computer. This will include a folder called Windows: as well as all the other programs that you use for creating and editing your data, such as word processing programs, spreadsheets, photo editors etc.
Note also an entry called 'Users'. The picture shows this opened up and has the words 'Brink', 'Default' etc. In this case the owner of the computer has the surname 'Brink' and clicking on this name will lead you to Brink's files. (NB. This will include all the default files and folders that appear under 'Quick Access'.
Further down the picture above you can see a second partition called D: and in this example it has been given the name “Backup”. The purpose of having separate partitions on your disk is to assist in managing the files contained. I always advocate creating a separate D: partition called Data (not Backup as here shown) and it will be here that I store all my folders and files. The advantages of this separate partition are twofold. First it makes it immediately easier to “navigate” straight to your personal data instead of having to click down through the This PC > partition. Second it greatly eases the process of backing up your data when you want to make a security copy on an external disk drive. Also, you can create a backup of just this personal data without having to copy across a whole lot of Windows Programs.
Once you have got the basic structure of your disk sorted you can move whole folders and individual files around, rename them and duplicate them. You can also add folders to the Quick Access section to enable you to navigate speedily to that part of your data. To do this you find the folder that you want to add and do a Right Click on the mouse and select “Add to Quick Access” from the drop down menu.
FILE NAMING
Having covered (albeit very briefly) the way that data is held on your computer disk, the next vital part of the skill to learn is how you name files and folders. Some of the difficulty that people have arises because, unless you tell it otherwise, Windows has an automatic naming and file location process.
Files are named by Windows according to the particular application (program) that has created the file. For example, when you create a new document in Microsoft Word it will usually allocate the name “Untitled”. If you just click ‘Save’ it will keep that name and save the document in whichever location you have selected for your documents or, by default, in the Documents folder. You should always try to follow the menu option that says ‘Save As’. Then you can create your own name for the document and specify where, on your computer, you want the item to be stored.
Note also that every file on Windows also has a ‘file type’ suffix added to it - again depending on the program that created it. Word documents, for example, will add “.doc” (or similar). This is done so that the computer can quickly locate all files of a particular kind. This helps you the user because if you use the search facility in the Windows Explorer file manager you can search on the term “?.doc” and it will return all Word documents regardless of their file name (the bit before the ‘.doc’). This is helpful if you have forgotten the name you gave to a particular document. Of course, if you know the name you can search for it immediately.
One of the most annoying aspects of file naming occurs with photographs and pictures. Unless you provide a specific name for a photograph it will be given a default filename something like “IMG0089.jpg” or “DSC 009.jpg” or simply a date and time followed by .jpg. In these examples, IMG stands for ‘Image’, and DSC means ‘Digital Still Camera’. .jpg is the file type that means the picture is in a format set down by something called the “Joint Photographic Experts Group”. There are many other variants of file name depending on the device on which the picture was taken. Similarly there are many variants of the file type for photographs other than .jpg according to the format that the photo is stored in. By way of interest here is a list of the more common types of photograph format. You can read up more about these by doing a Google search on each term and why they vary.
GOLDEN RULES FOR MANAGING YOU FILES
The rest of this article summarises these rules.
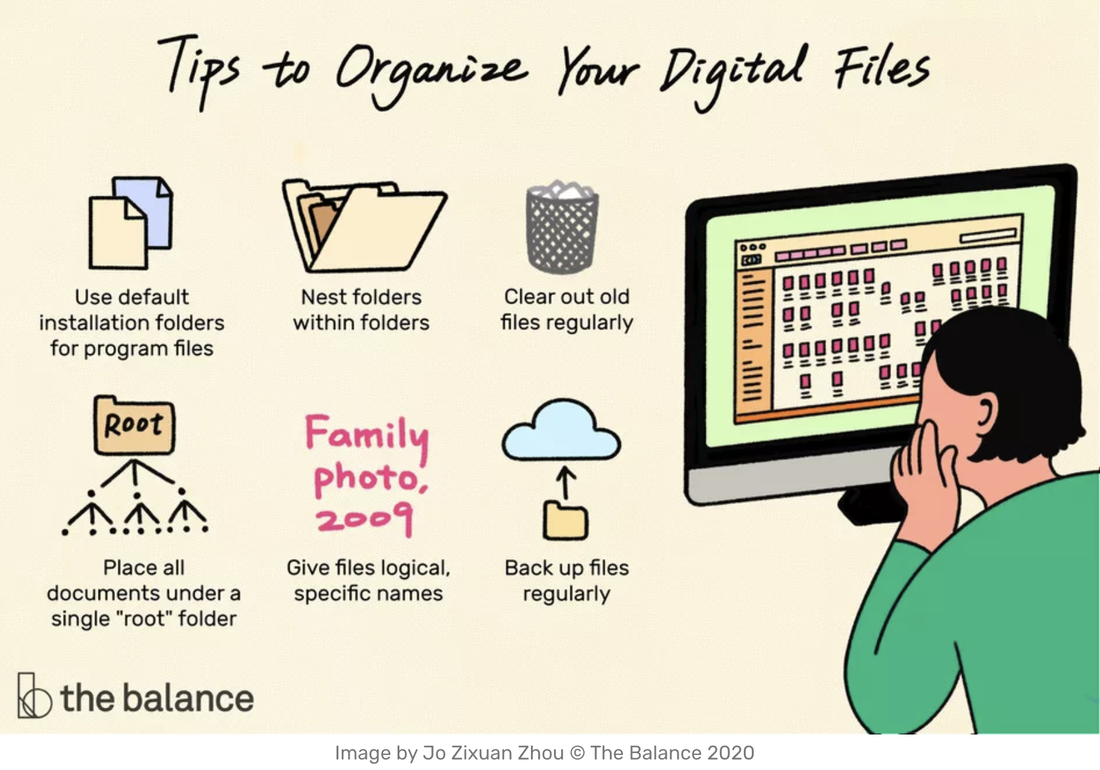
Use the Default Installation Folders for Program Files
Earlier on I mentioned the benefits of separating program files from data files. This makes it easier to keep track of your data and simplifies the process of backing up your data without copying across all the program files that don’t change.
One Place for All Documents
Following on from the principle of separating data from programs, it is important to retain one place where all your data is stored. Use subfolders (nested folders) for different types of data but ensure that the top level data folder is the only place where data is stored.
Create Folders in a Logical Hierarchy
Avoid having a single top level folder that has no subdivisions. This will simply grow out of all proportion and you will quickly discover that trying to find a specific file is like looking for the proverbial needle in a haystack. Make full use of nested files for different subjects or themes. For example, you might have a data file for photos of holidays. Create further subfolders for each trip, destination or year.
Follow the File Naming Conventions
Try to be consistent in the way you name files and folders so that they conform to the way that Windows stores them and also have meaning to you.
Be Specific
Try to allot meaningful titles to each file. If you have a folder for photos taken on a trip to (say) Cornwall in August 2020, don’t follow the default naming or you will have a list of files called Image001- Image xxx. These names mean very little and may require you to open each file in turn to find the one you want.
File As You Go
Get into the habit of saving files regularly when you are writing or editing a document. Not only is this good practice but it avoids the problem where your computer suddenly fails or there is a power cut and you find you have lost a lot of your current work.
Cull Files Periodically
Get into the habit of going through your files regularly and carrying out basic 'housekeeping' on them. Check that there are no duplicates, delete any that you are certain that you will never need again, and re-arrange any files that you think may be under the wrong folder or heading. It is also useful occasionally to archive files that are old and can be safely stored away because they are no longer in current use.
Backup Files Regularly
Lastly make sure that you regularly backup your data. I have written before about the importance of backups (see my earlier article on this here).
Now get to work on your files!!!

